Sunday, June 28, 2020

Bake 6c: Lemon Meringues


I have limited meringue knowledge, however, there will be a lot of meringue exploration as we work our way through all the GBBO bakes. 

To start I picked an ideal flavor, lemon...one that I love a pie, bar, cookie, really most any version of baked good with lemon is fabulous. I did some light meringue reading and found that they take flavors very well and a meringue cookie is rather simple to make. This is also a smaller recipe, it makes 25 cookies, if making these for a crowd where it would be considered rude if you did not share, consider doubling the recipe. 

Ingredients
2 egg whites
1/4 teaspoon salt
1/4 teaspoon cream of tartar
2/3 cup granulated sugar
1 teaspoon lemon zest
1/4 teaspoon lemon extract

These really are simple to make. 

Preheat the oven to 200 and prep two cookie sheets with parchment paper or silpat. Put your egg whites in the bowl of your stand mixer, or a sturdy bowl to use with a hand mixer. Beat on medium until they are foamy. Add the salt and cream of tartar. Beat until the eggs begin to thicken, slowly add the sugar as you continue to beat the eggs. Once the mixture is stiff peaks, fold in the zest and extract. Put the mixture in a piping back and pipe onto the baking sheet. Bake in the oven for two hours, rotating as needed based on your oven. We have a slightly hotter spot in the top left so I rotated twice, top to bottom and left to right. 

Allow to cool once baked and enjoy!

If you want to get fancy, paint a strip of yellow food coloring in your piping bag prior to adding your mixture, then the cookies will have a fun yellow stripe. If you are making a few flavors this is helpful to ensure you know which flavor each one is! 


Bake 6b: Earl Grey Macarons with Earl Grey Buttercream and Lemon Curd

Part 2 of our showstopper biscuit bake!

I love Earl Grey tea and the wife can attest that I drink a cup most every morning, sometimes two. I buy Twinings because it has a lovely balance ... Earl Grey is a standard black tea flavored with bergamot which is extracted from the rind of the bergamot cirtrus fruit. It is slightly floral, tart, citrusy, spicy and pairs well with the blank canvas of a macaron.

Since Early Grey tea is a lovely light citrus flavor you could fill these macarons with most any flavor of buttercream, chocolate ganache, vanilla anything, citrus curd, whipped honey... you have lots of options. I went the buttercream route so I could amplify the Earl Grey flavor and added a dollop of lemon curd in the middle for a nice tang.

Cookie first!

Ingredients
100 grams egg whites
100 grams granulated sugar
105 grams almond flour
105 grams powdered sugar
2-4 earl grey tea bags*
*tea in the bags is more finely ground to start with, and lets be honest, it is what I always have on hand. Feel welcome to substitute loose leaf tea if that is what you have. If you like a more pronounced tea flavor use more, less pronounced use less. 

Line two baking sheets with parchment, and prep a large piping back with a large round tip. I put the piping bag in a large cup so I can leave it standing to fill, much easier! If you aren't sure about your ability to pipe circles of the same size, trace circles on the parchment and then turn it over so the pencil is on the underneath side. They also make macaron templates you can use. 

In  a double boiler, whisk the egg whites and sugar until frothy and the sugar has completely dissolved. Transfer to the bowl of a stand mixture, and whisk until stiff peaks, start on low speed and gradually increase the speed.  

While that whisks. Sift the powdered sugar, almond flour, and tea bag contents together. I used three tea bags. I sift a second time due to the inclusion of the tea to ensure all the large coarse bits are removed and to evenly distribute the tea through the mix.

Pour the sifted ingredients into the stiff whites. Fold the mixture gently until combined and the batter is glossy and has a thick flowing consistency. You can test by taking a small spoon of batter and putting it on the parchment, if it behaves by spreading a bit and then looking glossy and smooth on top you are ready. If not, fold a few more times and try again. It is super important not to overmix, you will get running batter and there is no going back from there. 

Pipe onto the baking trays in small mounds. Leave the trays to dry for 30 minutes, longer if you live in a humid climate, you want them to be dry to the touch, this is what gives them a foot. (a foot is the little ruffle around the edge when they are baked).

While the cookies dry, make your buttercream and curd. 

Ingredients
1 1/2 cup powdered sugar
4 tablespoons salted butter, room temperature
1/2 teaspoon vanilla extract
3-5 tablespoons milk 
2 earl grey tea bags*

Put the tea in the milk for a few minutes to steep, then strain. Whisk the butter, vanilla, and 3 tablespoons milk. Add the powdered sugar. Add additional milk as needed to get a thick buttercream texture. Put in a piping bag with a round tip. 

Ingredients
4 egg yolks
2/3 cup sugar
1 tablespoon lemon zest
1/3 cup fresh lemon juice
6 tablespoons salted butter

In a double boiler, whisk the egg yolks, zest, juice, and sugar. Continue to whisk while the mixture thickens  ... Once thickened, remove from the heat and whisk in the butter. Spread on a cookie sheet or in a shallow pan and put in the fridge to firm up. Once cooled put in a piping back with a round tip. 

Preheat the oven to 325 and bake the cookies for 16-18 minutes, turning the tray at least once. Remove from the often and allow to cool before assembling. 

To assemble, pipe a ring of buttercream around the edge of one cookie, fill the center with lemon curd, and sandwich with a second cookie. 


Bake 6a: Key Lime Cream Puffs with Graham Cracker Craquelin

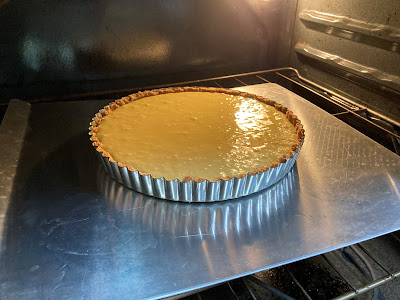
The Biscuit round showstopper was a big one! The bakers were asked to make petit fours: meringues, choux pastry and macarons. I was thinking that we needed a cohesive theme and being summer now, citrus seemed a great idea. 

So on the petit four party menu we have: Key Lime Cream Puffs with Graham Cracker Craqulin, Earl Grey Macarons with Earl Grey Buttercream, and Lemon Meringues. I will break them into three posts for ease of length but am going to bust them all out like they did in the show... here we go!


Have you every had a cream puff? That is where we start. We are going to make Key Lime cream puffs with a crunchy graham cracker craquelin on top. 

The craquelin needs to be frozen before use so that is step one. While I have made cream puffs before, this is the first time I will make one with a craqulin on top. It is usually made with butter, sugar and flour. Since we are going for a key lime pie experience, I traded some of the flour for ground graham crackers.

Ingredients
3 ounces unsalted butter, cubed, at room temperature
1/2 cup packed light brown sugar
1/2 cup flour
3 ground graham crackers

Cream the butter and sugar, mix in the flour and graham cracker. Roll between two sheets of parchment paper as thin as possible. Cut into circles (we want them to fit the top of the cream puff so the ones I did were 1 1/2 inches in diameter. Then the rolled sheets in the freezer until ready to bake. Do not take all the circles off 

Next the cream! We are going to make lime curd and then fold that with whipped cream for a light and tart filling.

Ingredients
1/2 cup sugar
1 egg
1/3 cup key lime juice
1/4 teaspoon salt
3 tablespoons butter
1 cup heavy whipping cream
1/4 cup powdered sugar

In a saucepan cook the sugar, egg, lime juice, and salt over medium heat. Once blended add the butter. Continue cooking over medium until the mixture is thick and bubbly. Cool in the fridge. I have started calling our fridge the (not) blast chiller for fun, and out of a desire to have a fridge I can actually put a sheet tray into! Pop your whisk attachment and mixing bowl in the freezer for 5 minutes, then pull them out and whip your cream, when it reaches soft peaks, add the powdered sugar. I am a light sugar adder, so feel welcome to add more if you want the end result to be sweeter. Fold the cooled lime curd into the whip cream. 

Next the puffs!

Choux is an interesting pastry as it is cooked twice, first on the stovetop and then again the oven. It can take a few rounds to get the feeling of the dough but once you know what texture and density you need, you will be off to the races. You could make eclairs, beignets, Paris-brest, St. Honore, or even a croquembouche!

Ingredients
1 cup water
1/2 cup salted butter, cubed, at room temperature
1 teaspoon sugar 
1 1/4 cup flour
3-4 large eggs 

Line two cookie sheets with parchment. If you are unsure of your ability to pipe all the mounds the same size, turn the parchment over and trace circles with pencil on the back to follow as you pipe. Alternatively if you are making LARGE puffs you can do the Martha Stewart suggestion of dipping a round cookie cutter in flour and marking circles on the parchment sheets to follow as she does in her cream puff recipe here. Preheat the oven to 425 degrees.

Bring the water, butter, and sugar to boil in a saucepan. Remove from the heat and stir in all the flour as quickly as possible with a wooden spoon. Return to medium heat, stirring constantly (you can skip arm day!) until the flour is cooked through. You will see the mixture pull away from the sides of the pan and a film will form on the bottom. It can take 3-5 minutes. 

Then put the whole mixture in a bowl for your stand mixer or to use a hand mixer. Mix on low, until cooled enough to touch the sides of the bowl comfortably, 1-2 minutes. Increase the speed to medium, adding 1 egg at a time. Each time you add an egg it will look wonky and curdled but it comes together in the end. 

Continue until soft peaks form, if needed, add the 4th egg. Transfer the mixture to a pastry bag fitted with a plain 5/8-inch tip. Pipe the dough into uniform mounds on your prepared sheets. Pull the prepared craquelin out of the freezer and top each mound with one of the cut rounds. 

Bake for 10 minutes, then reduce the oven temperature to 350 and continue baking for 18-20  minutes until golden brown. Do not open the oven during baking. The puffs use the stem created inside them to puff up, if you open the oven and release the steam then they will all come out flat and sad. No one wants a sad flat not-puff. 

Transfer to a rack to cool, poking each on the underside with a wooden skewer to create a few steam release holes to ensure they are dry inside. Once cool they are ready to fill.

Fill a pastry bag fitted with a coupler and filling tip, it looks like this. If you don't have a filling tip, then just slice your puffs in half, add a little filling and sandwich them back together. They will be fabulous either way. Fill all your puffs with cream and enjoy! 


Thursday, June 25, 2020

Bake 8: Cob

For the bread episode technical challenge, the bakers were asked to bake a cob using Paul Hollywood's recipe within 2 1/2 hours. Now I had to look up a cob of course, it is a round loaf of white bread. After our successful sourdough loaves this seemed reasonable. Here is our 'model' of a PH Cob:


Ingredients:
500 g white bread flour (plus a little extra for finishing)
40 g softened butter 
12 g fast action dried yeast
10 g salt
About 300 ml of warm water, PH recommends 'tepid' water, so aim for 100-110
A dash of olive oil

Do note that without a proving drawer to speed up the two 1 hour proving times, it is not actually possible to make this loaf within a 2 1/2 hour window.

Start by weighing out your first 4 ingredients and measuring the water. We have a ThermaPop that I use for all kitchen things that don't need a candy thermometer. Measure the water in a pyrex (since they have ml!) and then take its temperature and adjust. If your water is too hot then it will kill the yeast. 

Add the flour and butter to a large mixing bowl, add the yeast to one side, and the salt to the other. If they are in direct contact the salt will impact the yeast, it can be a bully. Stir to combine. 

Add half the water and mix around with your fingers. Continue to add water and turn about in the bowl until your mixture has picked up all the flour. Given our dryer climate I did add all the water.

Once you have a rough dough, lightly oil your work surface and turn the dough in the oil to lightly coat. Now knead like mad. The recipe says to knead 4-5 minutes, and that is nice, but it took closer to 10 minutes to get to the needed gluten development to pass the windowpane test. I don't know if that is a product of my kneading ability or something else but do check your gluten development every couple of minutes once you have kneaded the initial 4-5 minutes so you know when your dough is ready to move on to the proving step. You want a smooth stretchy dough. 

Lightly oil a bowl or tub (I used a straight sided tub) and add the dough. Cover with a damp tea towel or lightly oiled plastic wrap. Allow the dough to sit until doubled in size. The recipe noted it would take about 1 hour, and mine was very close to that. 

I have a dough bucket I use for proving because then you can see exactly when it has doubled, the straight sides allow for consistent rising, rather than a bowl with sloped sides that is harder to tell. If you have brilliant visual spacial skills though, prove in any shape bowl or container you want!

Once doubled, line a baking tray with parchment or silpat. Scrape the dough out of the container and knock it back, then using your hand to roll the dough up to turn into a smooth round loaf shape. Leave it on the lined baking tray, covered by a tea towel or lightly oiled plastic wrap (reuse that wrap from the first prove!). Again we want it to double in size. This will take another hour or so depending on how warm your space is. 

Once risen, preheat the oven to 425 degrees and put an old empty roasting pan on the bottom of the oven. 

Sprinkle some flour on top of the loaf and gently rub it in, you do not want to deflate the loaf. Using a large sharp knife make shallow cuts to create a diamond pattern. Put the baking tray + loaf in the middle of the oven and pour cold water in to the roasting tray and quickly shut the door. 

Bake for about 30-35 minutes until you see a crisp shiny crust on your golden loaf of bread. It should sound hollow when you tap on the bottom. Allow to cool on a wire rack. 

In our second rise we had a slight distraction (toddlers anyone!?) so the oven was delayed in preheating which led to a slight over prove. At least that is what Paul would say, "fantastic but slightly over on the second prove which is why it deflated". We will make it again and see if we can keep the full dome in tact.


Tuesday, June 23, 2020

Bake 7: Sourdough Bread

Episode 3! Bread! 

(Due to the size of the showstopper for the biscuit round, it needs a Saturday's worth of time, so this coming Saturday will be biscuit showstopper day! In the meantime we are working ahead...)

We are diving in with a signature bread bake. I have been working on my sourdough so it seemed like the right time to continue working on it. Given my lack of bread knowledge overall and certainly my lack of sourdough knowledge I am following a recipe for this bake from King Arthur Flour, you can see it here

I will not write out the recipe because I followed it to the letter after I got sucked down the rabbit hole looking through pictures of healthy and unhealthy sourdough starter. It is a fun science project that ends with snacks, I can get behind that! 

Here are the loaves after their second prove, ready to go in the oven... Bug helped with the front one so it has a few toddler prints in the flour which add character right?


I learned a valuable lesson after my first sourdough attempt a few weeks ago that they are not joking when they say to score deep. My first loaf grew an amoeba out the side when it couldn't expand properly, it was pretty funny. The wife can attest that I shouted about it growing an amoeba so she would come running to see. This time I probably overcompensated but it still turned out great! I baked it 35 minutes to get to the correct temperature so if you have a thermometer I suggest you test it that way to know it is done inside. 


It turned out pretty darn good! I am looking forward to making more, trying different shapes, and baking it in the dutch oven to see how that goes. There is so much you can do with sourdough!

Update December 2020: my loaf rolling technique has improved, check out this one I baked in the dutch oven! 


Sunday, June 21, 2020

Bake 5: Scones (British Style)

For the second episode technical, the bakers were tasked with baking scones... 

Now we are not talking about an americanized scone that you probably think of first, with all the flavors mixed in and a glaze on top that are meant to be eaten alone. British scones, I have learned, are more like a vessel, they don't have lots of things mixed in or sweet glazed tops, as they are meant to be slathered with butter, jam, clotted cream, YUM.

As it is a technical challenge I will follow Paul Hollywood's recipe (found here) to the letter and see what happens. This is our goal:


  • Ingredients
  • 500g/1lb 1oz bread flour, plus a little extra for rolling out
  • 80g/3oz softened butter, plus a little extra to grease the baking tray
  • 80g/3oz granulated sugar
  • 2 large eggs
  • 5 tsp baking powder
  • 250ml/8½fl oz  milk
  • 1 egg, beaten with a little salt (for glazing)

Method

  1. Preheat the oven to 425 degrees

  2. Lightly grease a baking tray with butter and line it with baking parchment or silicone paper

  3. Put 450g/15½oz of the flour into a large bowl and add the butter. Rub the flour and butter together with your fingers to create a breadcrumb-like mixture.

  4. Add the sugar, eggs and baking powder and use a wooden spoon to turn the mixture gently. Make sure you mix all the way down to the bottom and incorporate all of the ingredients.

  5. Now add half of the milk and keep turning the mixture gently with the spoon to combine. Then add the remaining milk a little at a time and bring everything together to form a very soft, wet dough. (You may not need to add all of the milk.)

  6. Sprinkle most of the remaining flour onto a clean work surface. Tip the soft dough out onto the work surface and sprinkle the rest of the flour on top. The mixture will be wet and sticky.

  7. Use your hands to fold the dough in half, then turn the dough 90 degrees and repeat. By folding and turning the mixture in this way (called 'chaffing'), you incorporate the last of the flour and add air. Do this a few times until you’ve formed a smooth dough. If the mixture becomes too sticky use some extra flour to coat the mixture or your hands to make it more manageable. Be careful not to overwork your dough.

  8. Next roll the dough out: sprinkle flour onto the work surface and the top of the dough, then use the rolling pin to roll up from the middle and then down from the middle. Turn the dough by 90 degrees and continue to roll until it’s about 2.5cm/1in thick. ‘Relax’ the dough slightly by lifting the edges and allowing the dough to drop back onto the work surface.

  9. Using a pastry cutter, stamp out rounds from the pastry and place them onto the baking tray. Dip the edge of the pastry cutter in flour to make it easier to cut out the scones without them sticking. Don’t twist the cutter – just press firmly, then lift it up and push the dough out.

  10. Once you’ve cut 4 or 5 rounds you can re-work and re-roll the dough to make it easier to cut out the remaining rounds. Any leftover dough can be worked and rolled again, but the resulting scones won’t be as fluffy.

  11. Place the scones on the baking tray and leave them to rest for a few minutes to let the baking powder work. Then use a pastry brush (or your finger if you don’t have a brush) to glaze them with the beaten egg and salt mixture. Be careful to keep the glaze on the top of the scones. (If it runs down the sides it will stop them rising evenly.)

  12. Bake the scones in the middle of the oven for 15 minutes, or until the scones are risen and golden-brown.

  13. Leave the scones to cool, then split in half and add butter, jam and clotted cream to serve.

I would have gotten in trouble because I sprinkled coarse sugar over the top of the egg wash and you definitely don't want to get creative in a technical challenge but we aren't going to tell anyone about that. Now, we don't have clotted cream, but making these scones led to me looking up how to make clotted cream so that next time I make these scones I can slather them with clotted cream. YUM!


Friday, June 19, 2020

Bake 4: Mace Snickerdoodles

The theme of the second episode is biscuits! Known as cookies for those who live on this side of the pond. As I have with previous bakes, I thought through my favorites. As this bake was to be the bakers favorite I figured that would be easy. Yet, I thought for a long time and realized I like a lot of cookies. Coming to a point of being stumped, I thought, well duh, I will call my mom, she knows what cookies I like best. Then it hit me - Snickerdoodles. Of course! Snickerdoodles! When I told the wife about this thought process later she laughed, it was the obvious answer apparently. 

Growing up, my mom would make us scrunch up our faces and say 'schnookerdoodle' in a very silly way because that is what you had to do to eat them. This was a lie but of course I will teach my son the same thing.

To mix things up, I am rolling my snickerdoodles in a sugar with equal parts cinnamon and mace. Mace is from the nutmeg tree which is native to Indonesia and Greneda. Mace is the lacy outer protective layer around the nutmeg. Nutmeg is the inner kernal of the fruit of the tree. Mace is a similar slightly lighter nutmeg flavor with a peppery note. I love it... reminds me of have a good cup of spicy chai and how the peppery warming spice hits the back of the throat. Yum! 


This is the recipe we used growing up, I still use it but with a few adjustments... use 1 cup of butter instead of the butter or margarine and shortening. Increase the salt to 1/2 teaspoon. I also increase the rolling sugar to 1/4 cup. I do that just so they are easier to roll but if you are concerned about wasting sugar, use 2 tablespoons and add more as needed.. It definitely doesn't make 6 dozen cookies, that is just silly Betty, she missed on the math there, it makes 3 dozen when using a standard size cookie scoop. 

Baking at 400 is critical and you do have to watch these ones. It says to bake 8-10 minutes, but I don't time them as the time changes based on using a cool pan, or a pan you just used in the oven. They puff up quite a bit, and when they are just beginning to deflate, and the outside edge gets the slightest bit of browning pull them out. Cool them on a rack and enjoy!

Want to be extra? They make amazing ice cream sandwiches if you smoosh a scoop of vanilla ice cream between two cookies, wrap in wax paper and freeze until solid. 


Back in the (baking) saddle!

Goodness, covid took over and then a series of other events led to making things work to get through... and baking took a back seat.  Stay t...