Showing posts with label Honey. Show all posts

Wednesday, August 5, 2020

Bonus Camping Edition: Skillet Cornbread with Honey Butter

Baking is portable! Baking can happen outside! Baking can happen while you are camping! The temperatures allowed for chili so of course we baked up some cornbread to go with it. You can bake on a fire directly or using a camp stove, just make sure you get the foil tight so it can create a little oven space inside and cook the top of the cornbread. You can also put a smoldering piece of wood over the top of the cornbread (as we did) to ensure the top cooks through.

Ingredients
1 cup fine ground cornmeal
1 cup flour
1 teaspoon baking powder
1/2 teaspoon baking soda
1/3 cup dark brown sugar
1/2 cup salted butter, cut into small pieces
1 large egg
1 cup whole milk
Butter or oil for your cast iron pan

For camping, mix the cornmeal, flour, powder, soda, and sugar in one container, and then the butter, egg and milk in a jar. At your campsite, make sure your fire or camp stove is heated and ready to go. Pour your wet ingredients into the container of the dry ingredients and mix. 

Heat up your cast iron pan on the fire, melting butter or oil in the pan. Pour in the cornbread batter and cover the pan with foil, crimping the edges to be sure it is sealed well. Cook until it looks done. 

If you are feeling fancy you can use some chopped bacon to oil the cast iron and then mix it into the batter. and skip using butter or oil. We were feeling fancy. 


Honey Butter is so very easy to make. Take 1/2 cup of soft salted butter and mix in honey. I use 1/4 - 1/3 of honey depending on the honey flavor. Our camping honey butter was made with 1/3 cup of fresh honey from my sister-in-law's backyard hive and it is amazing.

Tuesday, July 21, 2020

Bake 15a: Mixed Berry Tart

For the showstopper, the contestants were tasked with making both sweet and savory tartlets, 12 of each. As I lack tartlet pans, I decided to make one tart for sweet and one for savory.

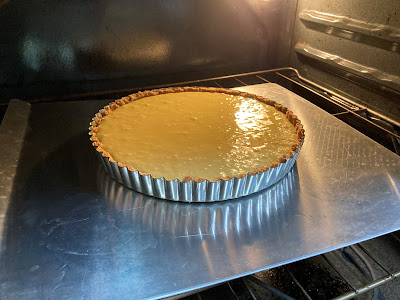
First up, sweet! A mixed berry tart with fresh blueberries, raspberries, and blackberries, over a honey lemon pastry cream with a sweet tart crust with just a hint of lemon. We were set to have dinner with family and it felt like an ideal dessert to bring along, since they just harvested honey for the first time from their backyard hive and the summer berries were looking great at the store. 

Ingredients

Crust
1 1/4 cups flour
1/4 cup powdered sugar
zest of 1 lemon
1 stick cold cubed salted butter (1/2 cup)
1 egg yolk.(save the white for the filling)

Filling
1/2 cup lemon curd (recipe here)
3 eggs
1/4 cup flour
3 tablespoons corn starch
2 cups whole milk
1/3 cup honey
2 tablespoons salted butter

Topping
Berries of your choice, I used 1 cup each of blueberries, raspberries, and blackberries
Juice of 1/2 lemon
1/4 cup jelly of your choice

Preheat the oven to 400 degrees. Coat a tart pan (I used a 9" round) with cooking spray with flour. 

Make the crust first. Process the flour, sugar, and zest together. Add the butter and pulse until the mixture resembles coarse crumbs. Add in the egg yolk and pulse until the dough clumps together. Press the crust into the pan, using your fingers, and the outside of a measuring cup sprayed with nonstick cooking spray so it won't stick. Dock the bottom of the crust with a fork 5-7 times. Bake until golden brown, 13-15 minutes and allow to cool completely.

Next the filling. Whisk together lemon curd, reserved egg white from the crust, and eggs in a large bowl. Add the flour and cornstarch. In a medium saucepan, heat the milk and honey over medium to a summer. Add 1 cup of that heated milk to the egg mixture, whisking constantly. Then return the egg mixture to the saucepan, cooking over medium, until thick and bubbly. 3-5 minutes. Remove from the heat and add the butter, whisking until smooth. Pour into the cooled crust, covering with plastic wrap and chill at least 4 hours. 

While that chills, glaze your berries. Melt the lemon juice and jelly in a small saucepan or a microwave safe bowl. You can then either toss your berries in the glaze (be gentle with raspberries adding them last as they fall apart) or arrange your fruit on top of the tart and then brush with the glaze. I went with the toss method so I could pile on LOTS of berries.


Sunday, June 7, 2020

Bake 1: Honey Apple Cake

I grew up in Washington, home of so many apples. To honor the Washington apple, I determined that the first bake of my 'bake-everything-from-GBBO' marathon should involve apples. Series 1, episode 1 was CAKE. The signature challenge involved the bakers being instructed to bake any cake they wanted using their creativity, and finishing within 3 hours. 

French apple cake is one of those easy classics that is good to keep in one's back pocket. It involves a buttery tender rum batter and lots of apples and this is my take on a layered version, with a buttery tender honey batter, lots of apples, and a cream cheese icing.


Ingredients
2 cups of flour
2 teaspoons of baking powder
1/2 teaspoon of salt
2 sticks butter, at room temperature 
1 cup of sugar
4 large eggs
2 teaspoons vanilla extract
1/2 cup honey
4 baking apples, I used granny smith

Cream Cheese Icing
8 oz cream cheese
4 tablespoons butter
4 tablespoons honey
Pinch of salt
3 cups (give or take) powdered sugar

Heat your oven to 350 degrees and prep two 9 inch cake pans. I am all about using baking spray with flour and the cake pans I use have a removable bottom. You could also line the bottom with parchment to ensure a clean turnout. 

Mix your flour, baking powder, and salt in a small bowl. I did not sift for this recipe, just a good whisk about. 

Cream the butter and sugar together until light and fluffy. Then add your eggs 1 at a time. Beat in the vanilla extract and the honey. 

Add the dry ingredients and mix until there is just barely combined. 

Now you have to decide what to do with your apples. You can chop them all or you can chop two thirds of the apple and then slice the rest and arrange it across the tops of the cake before baking. That creates a layer of apples in the cake similar to dried apples. Once you have decided, stir in your chopped apples, and then separate the batter into the two pans. If layering, add the apple slices to the top. 

Bake for 40 minutes, until golden and a toothpick inserted in the middle comes out clean. I rotate halfway through because our oven is a little hotter on the left side than the right.

While the cake cools, make the icing. Cream the cream cheese, butter, and honey. Then slowly add the powdered sugar until you have the consistency you like. If it gets too thick, add a little milk. 

Once the cake is cooled, place the first layer on your plate or stand, add icing and spread. Add second layer, and repeat!  I topped mine with a drizzle of honey and a few apple slices that I baked. They were intended to look like flowers but my slices were a touch too thick. Stay tuned for more fruit flower attempts! 

Next up, the technical challenge, Victoria Sandwich. 


Back in the (baking) saddle!

Goodness, covid took over and then a series of other events led to making things work to get through... and baking took a back seat.  Stay t...